You are the leader of an alien race, who has just successfully landed a small regiment of your troops on Mecatol Rex, the capital planet of the entire galactic empire. But getting there was the easy part. Now you must secure key locations throughout the city in order to tighten your grasp on it. Can you take control of Mecatol Rex, thus solidifying your control of the planet and, by extension, the entire galaxy?
That’s the question posed to players in the game Rex: Final Days of an Empire by Fantasy Flight games.
And, as with most games by Fantasy Flight, Rex is packed to the brim with high quality artwork, cards, and tokens. There’s even a plastic spaceship fleet that flies around the city, which makes me giddy. But, the players’ army units are simply colored cardboard tokens. They’re okay, but, c’mon, the army units are the pieces the players are pushing around the most. If you’ve already taken the quality of the game’s other components this far, why not go all the way and include something better than cardboard tokens for the units?
Upgrading the units in Rex: Final Days of an Empire is the "problem" that I will attempt to solve in this episode of Pair Of Dice Paradise.com’s The Component Proponent.
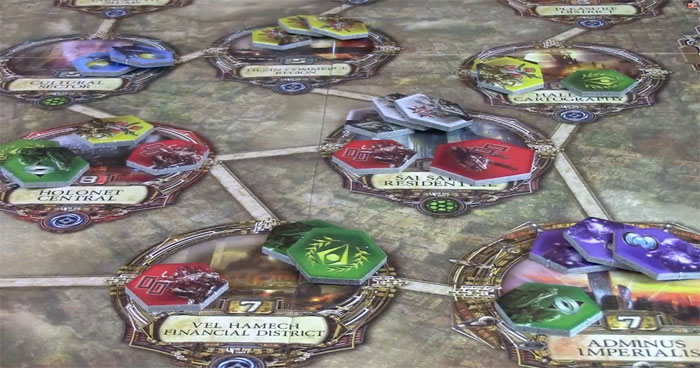
My objective was to find figures from another game that could be used to upgrade Rex’s cardboard tokens units. I began by looking through several games for pieces that could be transplanted into Rex. I decided on harvesting bits from another sci-fi area control game: Risk: Starcraft Collector’s Edition. Both games feature different races battling against each other to conquer planets and such, so it seemed like a good fit.

- For the blue player’s units, I used Risk: Starcraft's blue Terran marine units.
- For the yellow player’s units, I used the yellow Protoss zealot units.
- For the purple player’s units, I used the purple Zerg hydralisk units.
(Though only 17 of the 20 needed were available, so I had to add three of the brown Zerg units.) - For the red player’s units, I used fifteen of the red Terran marines, and five of their tanks.
But then, I encountered a problem: Rex and Risk: Starcraft don’t share all the same player colors. Specifically, Rex has white and green units, which Risk: Starcraft does not. It became clear that in order to upgrade Rex’s components, it was going to be necessary to take it to the next level: paint.
Actually, before we go any further, I first want to mention that this article isn't meant to be a tutorial. It’s more like an experiment. I don’t even know what I’m going to end up with. That being said, here’s the technique I used to repaint selected Risk: Starcraft’s units for use in Rex.
Supplies
The paints I’m using are Krylon white and gray primers, and Testors white, black, green paints and thinner, and a matte finish. The brushes I’m using are a variety of brushes I have left over from past projects from long, long ago. They’re mostly sable hair and nylon bristles, in a variety of different sizes.

Green Units
For Rex’s green turtle-like Xxcha units, I selected the Protoss stalker from Risk: Starcraft. They looked like the kind of alien that could have a big shell of some sort, so it seemed like a fair choice. All that was needed was to change them from yellow to green.
The painting was done in several phases. For the first phase, I applied a white primer base coat. While applying this primer coat, I kept the spray can about two feet back away from the figures, so the paint was applied in a fine mist. I did this to avoid getting big, gloppy drops of paint on the figures, which would obscure their details. After they were all primered, I let them dry.
For the second phase, I mixed green and black to make a green that’s actually darker than my desired final green color. I did this because this darker green will be used to fill in all the nooks and crannies to bring out the shadows. I added thinner to the paint in order to make it closer to the consistency of ink so that it would better work its way into the figure’s nooks and crannies.
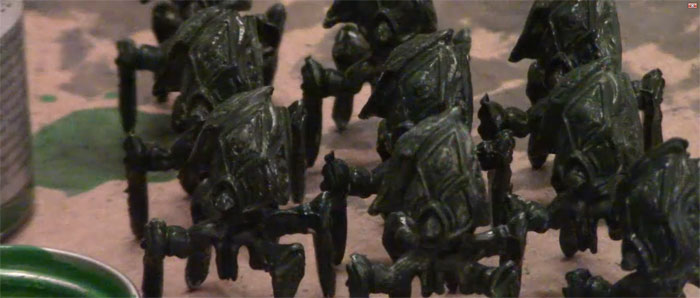
It took a couple of figures to get the green as dark as I wanted, but with twenty to paint, I figured that I’d live with the possibility of the first couple being a little lighter green than the rest. Once the dark green base coat was applied, they were allowed to dry completely.
In the third phase, I generously dry brushed the figures with a medium green. For this step, I used the color straight from the bottle. The goal of this dry brushing application was to color the majority of the figure, except for the recessed details, which I wanted to leave darker green. The contrast between the dark and medium green will help bring out its details. After the medium green layer had been applied, the figures were again allowed to dry completely.
The fourth phase was another round of dry brushing. This time, I mixed a little white in with the green, to make a very light green color. When drybrushing this time, I was more careful, trying to only apply the paint to figure’s raised areas in order to highlight them. Similar to how the dark green was painted into the figure’s recesses to add the illusion of shadows, the light color was applied only to raised areas to act as highlights. After being drybrushed with the light green, they again were set aside to dry.
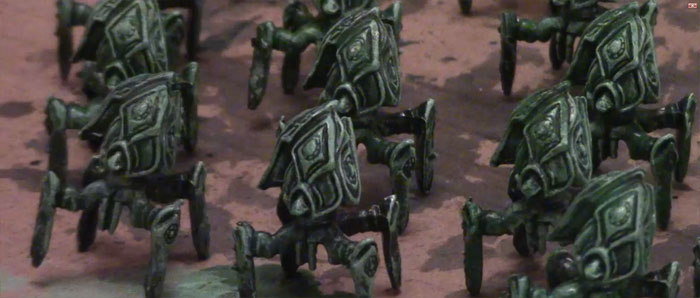
For the fifth and final phase, the painted figures were given two coats of a matte finish. This was done in order to (hopefully) prevent the green paint from flaking off easily. After one more round of drying, there were finished.
White Units
The white units were actually a little more straightforward. For these, I started with a coat of gray primer. My thought was that I’d make the dark-medium-light technique easier on myself by using a medium color to start with, hence the gray primer instead of white. However, I soon discovered that no, that wouldn’t work at all. Here’s why:
My original plan was to use the paint thinner to thin the black to the consistency of ink, and then use a fine, sable hair brush to apply it just to the recessed areas. However, the detail on these figures is simply too small, and I glorped black inky paint all over them.
So, I switched to “Plan B” in which I first gave them a light coat of black, let them dry, applied a frosting of white with the drybrush technique, let them dry again, and then drybrushed on a second layer of white.
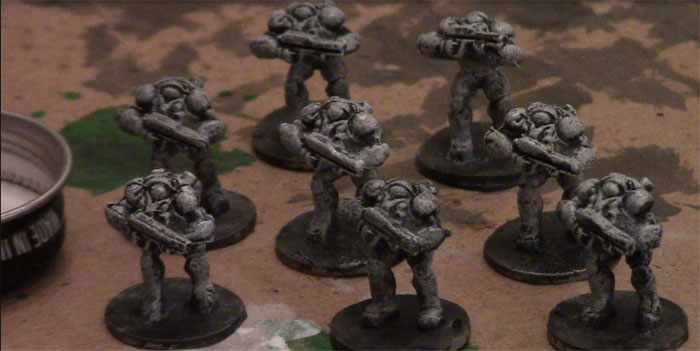
After the white was applied to the figure, I went back over the bases, giving them an extra coat of white. I painted the bases simply to have another visual indicator that these were the white color’s units.
After the bases were painted white, a few coats of clear, matte finish were applied to these pieces as well.
Final Results
And now, with figures available in all six traditional Rex player colors, we’re ready to invade Mecatol City! Here’s an examples of a game using the upgraded units to demonstrate how they turned out.
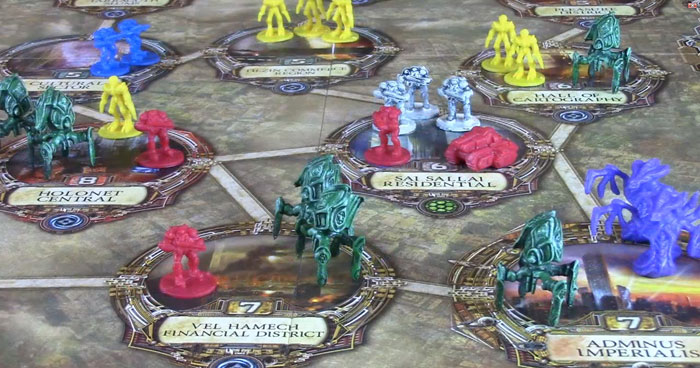
I hope this episode has been helpful in not only providing some ideas for upgrading the units in Rex: Final Days of an Empire, but also some tips for painting figures in order to add any player colors that may be missing from a game.
Thanks for reading. Until next time, I’m Chaz Marler, your Component Proponent!
